In the Peaks of Time, the aim is to locate all of the treasure boxes on a map. Because they give one-time-only incentives, they need 100% completion just once.
Several of the chests contain strong artifacts. These relics are similar to trinkets in that they may be worn by your hero.
Don’t be discouraged if you don’t succeed the first time; you may try again and again until you get it right.
Each adventure’s difficulty does not increase linearly with your level, allowing you to eventually out-level it.

Once you’ve finished Chapter 6: Stage 4, you’ll be able to enter the building.
Chests come in two flavors: crystal and gold. It is necessary to locate a particular number of crystal treasure boxes on the map in order to advance to new adventures.
LORE
It is rumored that the Peaks of Time were built by the god of creation, Honas so that he could keep an eye on all of his creatures in the present and the future.
Supposedly, Dura’s final fragments fell to the mountain’s high summits and were scattered, resulting in the formation of seven heavenly artifacts that were concealed somewhere within the mountain.

All seven items must be brought together for peace to return to the earth. Until then, the conflict will continue.
General Tips For Peaks of Time
These broad recommendations will aid your progress in Peaks of Time; at the conclusion of this book are links to more in-depth walkthroughs for each realm, but I strongly advise you to start with these first.
Hero Selection

Choosing the heroes you’ll utilize for the upcoming battle in Peaks of Time is critical, and you should keep these two factors in mind:
- Stop a hero from being lost! You run the danger of losing a hero if you use one with low health. Only when you have fast-healing relics or at the start of a conflict with Faction benefits should you utilize a hero.
- Avoid using a hero who is vulnerable to the faction the opposing side employs. For example, if all of your adversaries are maulers, you’ll want to avoid employing nature faction heroes because they’ll take 25% more damage from your opponents.
You can’t risk losing a hero in a fight, thus it’s best to prepare your squad to be more resilient in the first place.
Peaks of Time’s fights may be canceled, something most players aren’t aware of.
When a fight is canceled, all damage and heroes killed will be carried over, however, if the fight is restarted, all damage and heroes killed will be reset!
You can do this if a hero has taken a lot of damage or has died and you want to re-run the fight. With auto-fighting, the outcome might be very different depending on how dodges, evades, or critical hits are applied!
Don’t use Auto Mode
For typical campaign map combat, using auto-fight in AFK Arena is perfectly OK — in Peaks of Time, though, you don’t want to use it, especially if you’re fighting in close quarters.
After combat, not only will the HP lost and dead heroes remain, but so will the energy bar.
The abilities and ultimates of your heroes will be activated as soon as they charge if you utilize auto-combat. You’d rather have all of your heroes’ energy filled up for the next fight so you can unleash their ultimates right away instead of having to wait while they recharge, because that way, you know you’ll win.
Peaks of Time is a game that requires a lot of effort, but I can guarantee you that it will pay off in the long run.
Planning Heals
Before using a healing fountain, try to rotate between your heroes as many times as possible. If you want to get the most bang for your buck, use it when you have 6-8 heroes with around 50% of their health left rather than 2 heroes with 30% of their health.
The peak of Time’s healing fountains are your life insurance, so don’t rush to utilize them.
Use the Right Relics
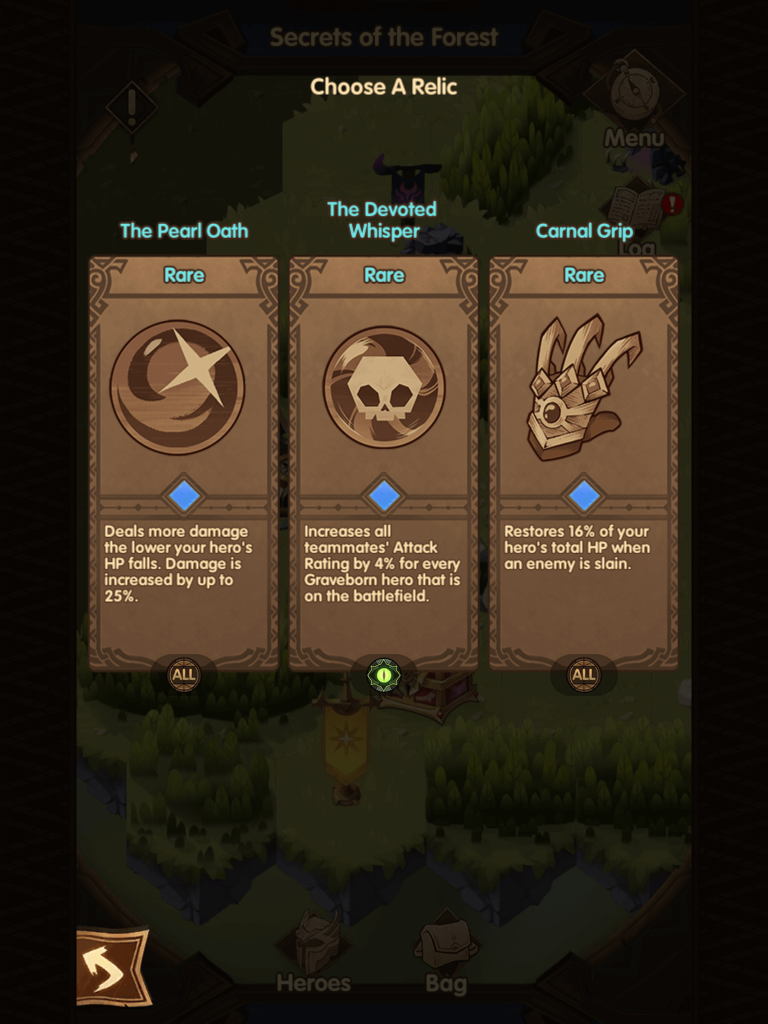
At the end of each battle, you may pick from three relics that will remain active until the end of the current session and they will provide your squad a massive boost in Peaks of Time, especially when you have like 10 or more.
Choose healing, life leeches, and shields over any other relic in order to keep your warriors alive. That’s when you may employ things like turning the opposing heroes against their own team, increasing their dodge chances, or giving them extra protection from the relics.

For an extra boost if none of the above are available, utilize the ones that increase crit rating or crit damage.
Keep in mind the importance of relics that apply to all heroes, rather than specific relics or faction bonuses – you’ll find several mercenary camps with extra heroes in Peaks of Time and you’ll want the advantages of the relics active in each of them.
The Peak of Time Stages
Chapter 1: Ranhorn’s Strife
Reward: Dura’s Grace Artifact
The Peaks of Time in AFK Arena begin here. As a result, it’s a breeze to finish.
If your squad isn’t too weak, you’ll be done in only a few minutes flat.
In the end, you’ll be given a strong item that increases your Hero’s Dodge and HP capabilities. It’s best to put it on a Hero on the front line.
Chapter 2: The Unrelenting Blaze
Reward: Gold, Diamonds, Summons, etc.
Additionally, Chapter 2 is a breeze to follow.
To get the prizes, simply take out all of the opponents you encounter while exploring the map.
Please leave a comment below if you need any assistance with this map!
Chapter 3: Secrets of the Forest
Reward: Dura’s Eye Artifact
It’s much more fun to play Peaks of Time now that most people don’t know how to get the entire map unlocked. The majority of gamers are unable to open more than 80% of the map before they give up.
As you go through this stage and destroy more and more foes, the vine expands until it completely obstructs your way. You’ll become locked in a cycle of replaying Secrets of the Forest over and over again.
Chapter 4: Rest In Peace
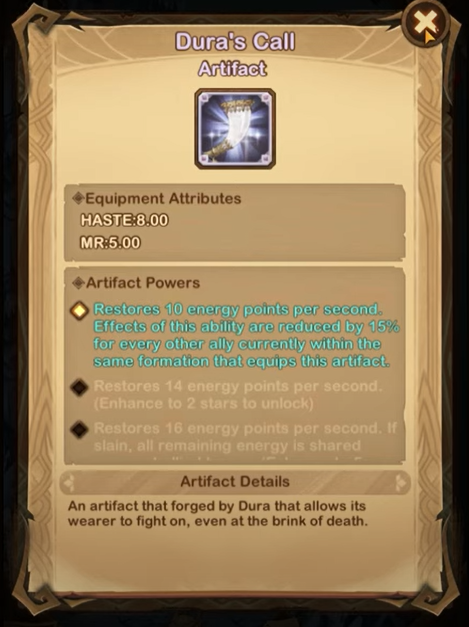
Reward: Dura’s Call
There are a number of curses on the doors that must be lifted in order to get access to the last crystal chest in this chapter.
Curses can be lifted by touching three headstones marked with the relevant symbols. To know more about the Rest in Peace Guide visit here.
Chapter 5: The Ancient Ruins
Reward: Gold, Diamonds, Summons, etc.
Ancient Ruins Chapter is clearly one of the Peaks of Time’s most difficult chapters towards the beginning of the game, which is why it’s so difficult.
To clear your path, use the levers on the map to knock down the colored walls impeding your path. In the future chapters, you’ll have to use these Levers a lot more.
Chapter 6: Far Frontier
Reward: Dura’s Drape
To clear the map, players must fight the map’s Chief Enemies. At the start, though, they will be highly strong if you target them.
Chapter 7: Divine Realm
Reward: Elite Shemira
You must re-read this chapter twice to finish it.
To access a secret island, players must press three buttons of the same colour at the same time. For each of the two islands, you must do this twice.
A tile is lost every time one of your moves is made, therefore it’s important to move swiftly and concentrate on the distant buttons first.
Chapter 8: Rancid Forest
Reward: Gold, Diamonds, Summons, etc.
In order to construct the bridge that connects the forest to a secret location, you must press the buttons concealed on the map in this chapter.
Focus on the shorter bridge in order to complete the map more quickly and more easily.
Chapter 9: Viper’s Marsh
Reward: Gold, Diamonds, Summons, etc.
Peaks of Time’s Viper’s Marsh is a basic chapter. There are no difficult puzzles to solve in this situation. There isn’t a sly foe lurking around the corner waiting to ambush you. It’s all about assembling a formidable squad to take on the game’s most formidable foes.
At the conclusion, you will get the Dura’s Blade as a prize.
Chapter 10: The Dismal Descent
Reward: Artifact Fragments, Diamonds, Gold, Hero’s Essence, etc.
In this chapter, there is no difficult route to navigate. Having a well-balanced squad and making the most of your factional advantages are all that is required to beat all of the powerful Chief Enemies in the game.
Chapter 11: The Savage Wastes Map
Reward: Dura’s Blade
Unlike the previous Peaks of Time Chapter, this one doesn’t need a complex manoeuvre to accomplish it. This map, on the other hand, decreases your Heroes’ HP by half every time you win a combat.
Healers and HP recovery relics are key components in this fight.
Chapter 12: The Solar Plane
Reward: Dura’s Conviction
To acquire the Dura’s Conviction, you must fight all six bosses that defend the last crystal chest.
The key to winning this chapter is figuring out which Heroes work best on this map and which bosses are the weakest.
Chapter 13: The Burning Woods Map
Reward: Mythic Item, Summon Scrolls, Gold & Hero’s Essence
This map must be completed twice. The first time you encounter Ira, you need to assault the boss.
After that, you’ll have to face Vurk, the game’s last boss.
Chapter 14: The Abysmal Delves Map
Reward: Mythic Item, Dura’s Chalice of Vitality
The design of this map is actually rather straightforward. To vanquish your adversaries, all you need is a strong enough group.
The massive hammer at the very bottom of the map is your first stop. Using this hammer, you will be able to smash through the ice that is in your way.
Chapter 15: The Contorted Realm Map
Without decent starting guidance, this is a difficult map that will take a lot of tries. If you make a mistake in this chapter, your progress will be wiped clean, and you will have to start again from the beginning. If you want to know about Contorted Realm Guide check here.
