


Active Mixer Devices are an essential component of your Windows XP system, responsible for managing audio settings and controlling sound playback and recording. Installing and configuring these devices correctly is crucial to ensure your computer’s audio functions smoothly. In this comprehensive guide, we’ll walk you through the step-by-step process of installing Active Mixer Devices on a Windows XP system.
Before diving into the installation process, make sure you have the following:
- A Windows XP installation CD or access to the necessary installation files.
- Administrative privileges on your Windows XP computer.
- Basic knowledge of your computer’s hardware components, especially your sound card or integrated audio chipset.
- Patience and attention to detail, as the process may vary depending on your hardware.
Now, let’s proceed with the installation:
Step 1: Access Device Manager
- Click on the “Start” button located at the bottom left corner of your desktop.
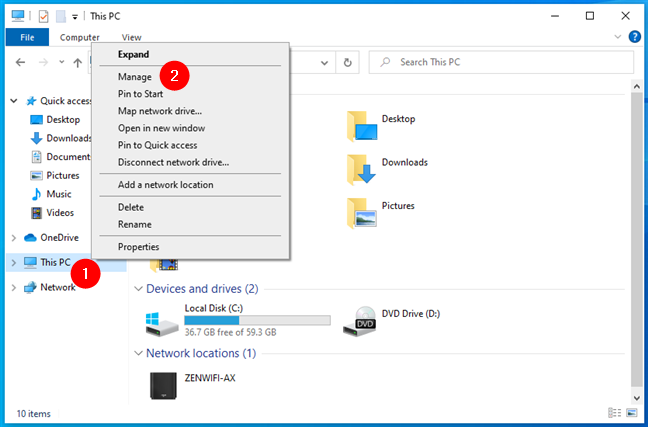
- Right-click on “My Computer” and select “Properties” from the context menu.
- In the System Properties window, click on the “Hardware” tab.
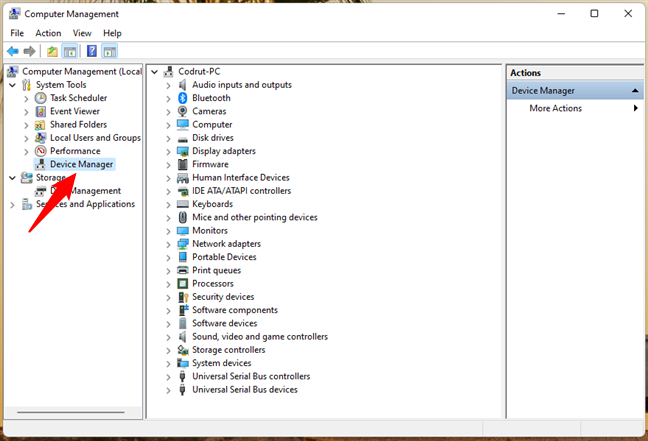
- Click the “Device Manager” button. This will open the Device Manager window, where you can manage and configure hardware devices.
Step 2: Locate your audio device
- In the Device Manager window, expand the “Sound, video, and game controllers” section by clicking on the plus (+) sign next to it.
- You should see your audio device listed here. It might be named after your sound card (e.g., “Realtek High Definition Audio”) or something similar.
Step 3: Install or update the audio driver
3.1. If you have a driver CD or installation files:
- Insert your driver CD into the CD/DVD drive or locate the driver installation files you downloaded.
- Right-click on your audio device in the Device Manager and select “Update Driver” from the context menu.
- Follow the on-screen instructions, selecting the option to install the driver from a specific location.
- Browse to the location of your driver CD or installation files and select the appropriate driver.
- Complete the installation process, and the Active Mixer Device should now be installed.
Also Read: https://thegamedial.com/how-to-update-all-the-software-on-windows-10-pc/
3.2. If you don’t have a driver CD or installation files:
- Right-click on your audio device in the Device Manager and select “Update Driver” from the context menu.
- Choose the option to search for drivers automatically on the internet. Windows XP will attempt to locate and install the appropriate driver.
- Follow the on-screen prompts to complete the installation.
Step 4: Verify the installation
- After the driver installation is complete, your audio device should appear without any error icons in the Device Manager.
- Double-click on your audio device to open its properties window. Under the “General” tab, you should see a message indicating that the device is working properly.
Step 5: Configure audio settings
- Right-click on the speaker icon in the system tray (usually located in the lower-right corner of your desktop) and select “Open Volume Control.”
- Adjust the volume settings and ensure that none of the audio channels are muted or set to extremely low levels.
- Click on the “Options” menu in the Volume Control window and select “Properties.”
- In the Properties window, make sure all the available audio channels are checked.
- Click “OK” to save your settings.
Also Read: https://thegamedial.com/use-and-download-obs-studio/
Conclusion
Installing Active Mixer Devices on Windows XP is a fundamental step to ensure your computer’s audio functions correctly. By following this step-by-step guide, you can install the necessary audio drivers and configure your audio settings, allowing you to enjoy clear and crisp sound on your Windows XP system. Remember to periodically update your audio drivers to keep your audio experience optimized and free from issues.