


Enhance my writing by adding a personalized cursor to my website. User awareness of the cursor is usually nonexistent. What displays where the mouse is pointing is just a flickering line. However, by pushing client interaction, a unique personalized cursor can raise engagement.
Branding your website and making it uniquely yours can be achieved by adding a custom cursor. That is to say, users can stay on your webpage for longer by using the right mouse pointer. Also, it increases the likelihood that buyers will buy from you or subscribe to your email list.
It needs a website to get clients to engage with your equipment when you first open for business. Dealing with your website is more enjoyable when you have a personalized cursor. It’s important that a custom cursor doesn’t cause any distractions or annoyances nonetheless. A paperclip with the best of intentions was introduced to the world by Microsoft Office 97 more than twenty years ago. Clippy, on the other hand, became an industry joke after swiftly becoming the most popular support call generator.
What is a Custom Cursor?
It’s easy to say that a custom cursor modifies the mouse cursor’s (or pointer’s) existing icon design. The system settings on your computer make it simple to adjust the cursor. Custom website cursors are specific to each particular website, but the same may be done with website design.
Designing custom cursor designs for websites is possible with HTML, CSS, and a tiny bit of JavaScript. A distinctive experience can be created by changing the cursor, adding hover animations, clicking effects, and much more.
Why Make Use of Them?
Yes, fashion and appearance are the key factors. Custom cursor, on the other hand, can enhance the immersiveness of your website design.
Using animations, parallax effects, and moving objects, pictures create a stunning event page for a website. Furthermore, the cursor’s outdated system default design remains. That might really ruin your mood.
To enhance user engagement with the website, consider using a personalized pointer. Assign users tasks and provide them with instructions on where to go. Not to mention, differentiate your website from the competition.
Also Read: https://thegamedial.com/if-i-share-a-folder-in-google-drive-can-they-see-my-other-folders/
How do I customize the cursor on my website?
An individualized mouse cursor can be created in two main ways. CSS or JavaScript are options. You will need to navigate to the CSS script you wish to edit before adding any CSS or JavaScript. The Add and Edit Web Page Sections panel may be found in the MailChimp Web Page Builder if you are using it.
Here’s how to do it:
- Click Edit Site while you are on your website dashboard.
- Click Edit Page after hovering over the page and selecting it for editing.
- Navigate to the Sections panel in the Mailchimp site builder. Your web page’s components will be displayed to you as the panel expands.
- You can view a chunk of the page by hovering over any part of the panel.
- For a list of available styles, click the part where you wish to change the looking pointer.
- If you would like to update the CSS code, click edit to access the area.
How to create a custom cursor using CSS?
- Customizing cursors is possible with CSS. It is possible to add additional interest to your mouse pointer by using the CSS body section’s cursor property. In PNG, JPEG, or SVG format, an image is required.
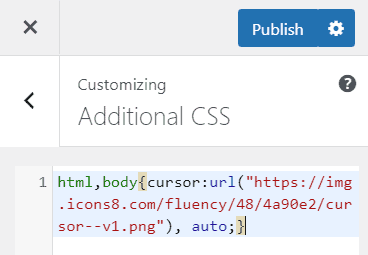
- After that, modify the pointer to the desired graphic by using the following bit of code in the CSS of the part you wish to customize:
- body { cursor: url(‘YourCursorImage.png’), auto; }
- One can specify one of several cursors to display using the cursor attribute. Listing “auto” as the default should come last. By doing this, in the event that nothing else functions, the user’s browser can display its original cursor.
Employ this syntax:
- cursor: value, auto;
- Using the sentence below, for instance, will enable you to indicate to the user to wait by making the mouse cursor a blue circle. The browser has a fallback option if it doesn’t know how to interpret a specific value, “auto,” which is added at the end of the statement.
- cursor: progress, auto;
- You can use hundreds of values with the CSS cursor property; here are just a few examples. Go to the Mozilla developer page for a more comprehensive description.
- Making your CSS cursor unique can also be accomplished by adjusting its color, particularly if the colors you choose complement your branding style. In the CSS script, you may adjust the size and color. To avoid making your mouse pointer excessively big or hard to see against your webpage’s background, just use caution.
Also Read: https://thegamedial.com/how-to-force-quit-on-mac/
The custom cursor for Chrome
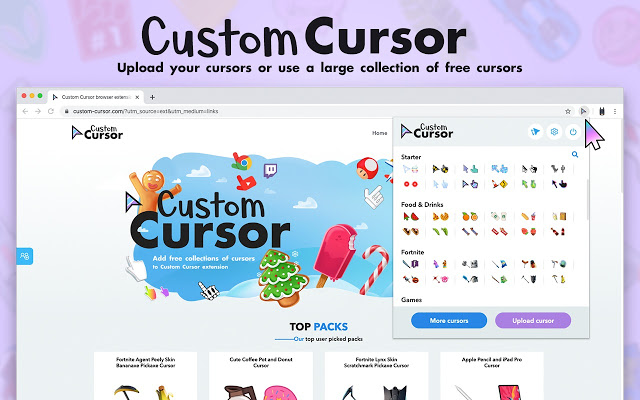
We’ll start with Chrome’s unique cursor plugins since it’s the most widely used web browser. Lightsabers, cartoons, and Minecraft are among the roughly one hundred free options included.
In case it satisfies the size requirements, you are permitted to utilize your own image as a cursor. Suggested size for the graphic should be 16 by 16 or 32 by 32 pixels. Though you should start with the smaller sizes, you can use up to a 128 by 128 image. An image with a clear background is what Chrome suggests for best viewing. It will cover a portion of your webpage if the background isn’t clear. The add-on may be downloaded for free from Google’s Chrome Marketplace. Your web page will need to be refreshed after installing the plugin.
Notably, the Custom Cursor for Chrome has significant limits. Firstly, the majority of store pages will not support it. Secondly, it may only be accessed through Chrome. However, it is a quick and dirty method to check how various mouse pointers would seem on your website. As such, the Chrome extension is not excellent for web designers.