It’s simple to record your screen on a Mac, whether you want to save a YouTube video you’re watching or teach someone how to solve a computer issue. You may even display your mouse clicks and capture sounds. Regardless of how old your Mac is, here’s how to record all or just part of your screen.
How to Screen Record with Keyboard Shortcuts
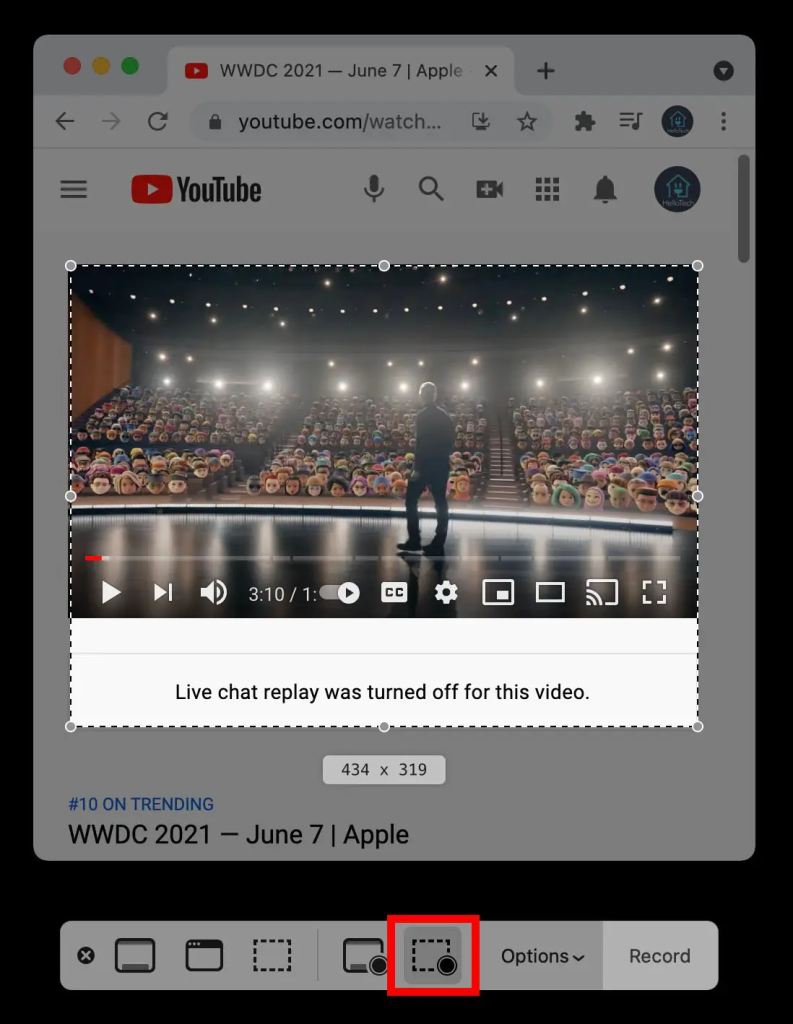
On a Mac, use the keyboard shortcuts Command + Shift + 5 to record your screen. Next, using the pop-up toolbar that shows at the bottom of your screen, choose either Record Selected Portion or Record Entire Screen. In the end, select Record.
On your keyboard, press the Command + Shift + 5 keys. The Screenshot Toolbar will appear at the bottom of your screen as a result.

Next, choose to Record Selected Portion or Record Entire Screen. After the “x,” there is a fourth button that allows you to record the whole screen. Selecting a section of the screen to record may be done by pressing the fifth button. Hovering your mouse over each icon will reveal the function of each button.
Read More: List of Stellaris Technology with Cheat IDs

You’ll notice a box with broken lines on your screen if you decide to record some of your screen. Next, you may select what you wish to capture by clicking and dragging the box’s edges.
Then select Record. This is located on the toolbar’s far right side.

Lastly, to end the recording, click the square in the circle symbol at the top of your Mac’s screen. To stop recording, you may alternatively use Command + Control + Esc.
Read More: Roblox developer’s arrest steals spotlight at game conference

Note: Click the Options button in the snapshot toolbar if you would like to capture your voice or audio during screen recording. This is also where you may select the location for your recording, create a timer for when your recording begins, and record your mouse clicks to appear in the video.
